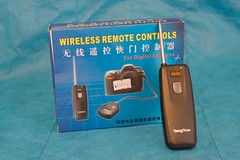
I recently picked up a cheap RF remote for my new Canon 50D.
Unfortunately, it arrived a little bit too late for the two family portraits I was enlisted to take over Thanksgiving. Additionally, the 50D doesn't have an infrared remote sensor like my old 300D, so I couldn't use my old infrared remote. My options were limited. I really didn't want to have to set a 10 second timer then run into the picture, wait, pop, run back, repeat. Instead, I took advantage of the wireless networking capabilities of the attached WFT-E3 (wireless file transmitter) unit and I used my iPhone as a WiFi remote. It wasn't ideal, but it definitely did the trick in a pinch.
This would have been much easier by connecting to an existing 802.11 network, but I could not rely on a network being present. So I instead chose to use an ad hoc direct wireless network connection between the camera and the phone. Additionally, since the iPhone doesn't support creating an ad hoc network, I needed to setup the network on the camera first then connect to that network with the phone.
It wasn't completely obvious how to get this setup working, so I will explain here in case anyone else out there on the internet ever finds themselves in a situation where something like this might come in handy. The required gadgets are:
- Apple iPhone (or any mobile device with WiFi and a decent web browser)
- Canon 50D or 40D (or probably 5D) camera
- Canon WFT-E3 wireless file transfer unit (or probably the comparable 5D-compatible unit)
WFT Configuration
The first step is to configure the WFT to create an 802.11G Ad Hoc wireless network.Under the WFT settings > Set up > LAN settings choose Set 2 (assuming Set 1 is your home network) and choose the Change button.

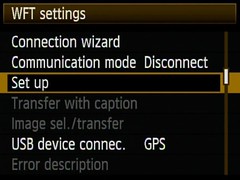

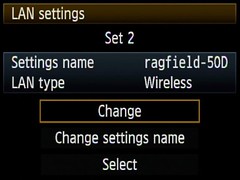
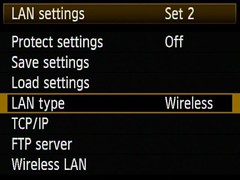
Under the WFT settings > Set up > LAN settings > Set 2 menu set the LAN type to Wireless.
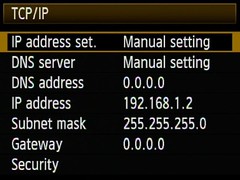
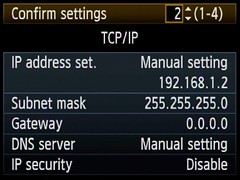
Under the WFT settings > Set up > LAN settings > Set 2 > TCP/IP menu set:
- IP address set to Manual setting
- DNS server to Manual setting
- DNS address to 0.0.0.0
- IP address to 192.168.1.2
- Subnet mask to 255.255.255.0
- Gateway to 0.0.0.0
- I just left Security tuned off for simplicity, but feel free to use WEP if you want
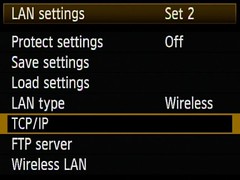
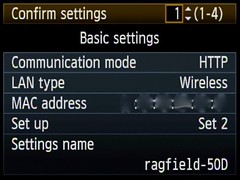
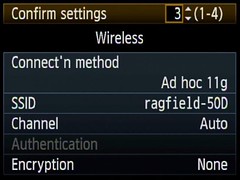
Under the WFT settings > Set up > LAN settings > Set 2 > Wireless LAN > SSID menu enter the name of the wireless network you are going to create. I called mine ragfield-50D.
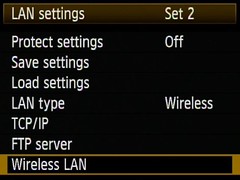
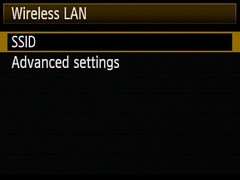
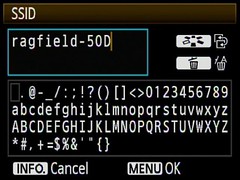
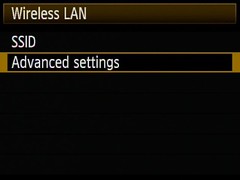
Under the WFT settings > Set up > LAN settings > Set 2 > Wireless LAN > Advanced settings menu set:
- Conn. method to Ad hoc 11g
- Channel to Auto
- Encryption to None



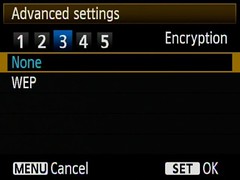
Now it is time to activate the WFT's HTTP server. Under the WFT settings menu set Communication mode to HTTP.
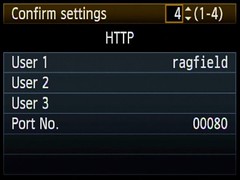
In order to access the HTTP server we need to set up an account with a user name and password. Under the WFT settings > Set up > HTTP settings > HTTP account > User 1 set the Login name and Password to your desired login name and password.
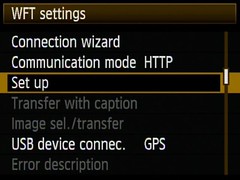
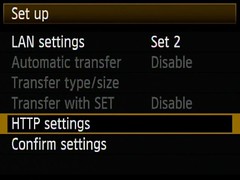
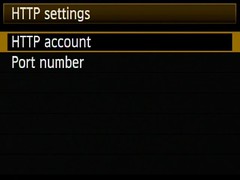
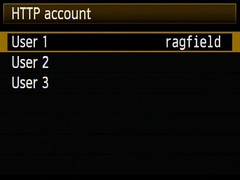
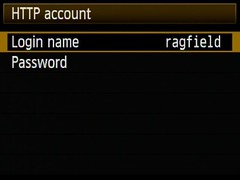
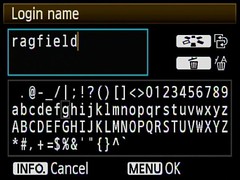
At this point the green LAN indicator light on the back of the WFT should be blinking and we can now connect the iPhone (or other device) to the camera. Go ahead and take one last look at WFT settings > Set up > Confirm settings and scroll through the four screens to verify the settings are correct.
iPhone Configuration
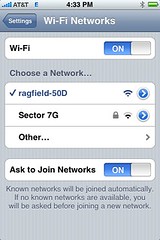
The iPhone configuration is much simpler than the camera/WFT configuration, and the user interface is much better so this goes quickly. In the Settings application choose the Wi-Fi list item. A list of available wireless networks will be displayed and, if the WFT is configured correctly and running, the WFT's network name will appear in this list. Choose this network (in my case ragfield-50D).After the iPhone switches to your WFT's ad hoc wireless network click the blue circle button to the right of your network's name to open the TCP/IP settings. Configure the network by setting:
- IP Address type to Static
- IP Address to 192.168.1.3
- Subnet Mask to 255.255.255.0
- Router leave blank
- DNS leave blank
- Search Domains leave blank
- HTTP Proxy to Off
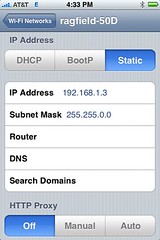
Now the iPhone is correctly configured to connect to the camera/WFT. One interesting thing to note is that even though the iPhone is using WiFi to connect to the camera the WiFi icon does not appear in the status bar. A 3G or E(dge) icon will appear instead. This is fine.
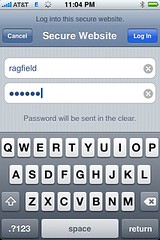
Press the home button to exit the Settings application and tap on the Safari icon to launch the web browser. Type 192.186.1.2 in the address bar and press Go. Safari should prompt you for the user name and password you entered into the WFT settings > Set up > HTTP settings > HTTP account > User 1 menu. Enter these values and press Log In.
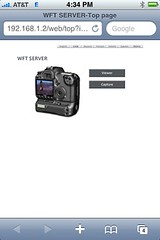
The WFT's default web page will appear. Press the Capture button next to the image of the camera on the web page.
The button to do a remote capture is the little blue circle on the image of the wired remote control on the web page. Zoom in for a target large enough to hit with your finger while you're looking at the camera.
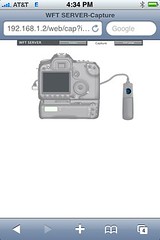
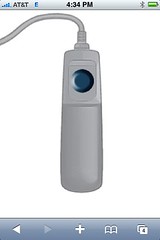
It helps if the hand holding the iPhone is hidden behind another person. Thanks for covering for me Melissa!




5 comments:
Anytime, RB!
I had no idea that taking the family photos was such an involved process. Wow.
Cara... gin and tonic please?
YEP, YOU DID IT EXACTLY LIKE I WOULD HAVE!
Nice job!
momscho
GOT IT. Thanks for the INFO , I KNOW I will USE IT!!!!!!!!!!!!! You're the genius,,,,,,, thanks for your extra KNOWLEDGE in making it all happen! and with MOVING subjects, even!!! A SOLO???????? PLEASE entertain us at CHRISTMAS!! Can't wait to hear.. luv and hugs, nan
Fantastic guide on how to do it.
Any advice on setting up the wft e3 on canon 40d wireless via ftp/ptp to a macbook pro with mac os x snow leapord. Really desperate. I get an error unable to connect to ftp server. I guess my problem lies on the mac setup of an adhoc network and ensuring it is visible, I would really appreciate any help please.
@JGP I can't really help with that setup. I've never tried it before.
Post a Comment